G Suite Business Free for 30 Days
Sign up for a Free 30 Day Trial of G Suite Business and get Free Admin support from Google Certified Deployment Specialists.

First up for a new Google Apps Administrator is to create users. While access to the Google Apps Provisioning API allows for unlimited ways to create users there are only 3 ways to create users through the Google Apps Control Panel.
Before you can create a new user in Google Apps you need to purchase a license from your local Google Apps Reseller.
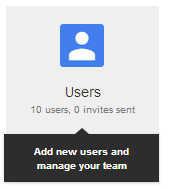
To access all 3 ways to create users in the Google Apps Control Panel, click the Users icon in the Control Panel. A list of users will appear below the Control Panel icons.

Google Apps Control Panel Icons in the Users section.
 |
Download List of Users |
 |
Select Columns |
 |
Add Users |
 |
Filter Users |
Now that you’re familiar with the basics of the User Control Panel in Google Apps, let’s look at the 3 Ways to add users in the Control Panel.
1. Add a User Manually
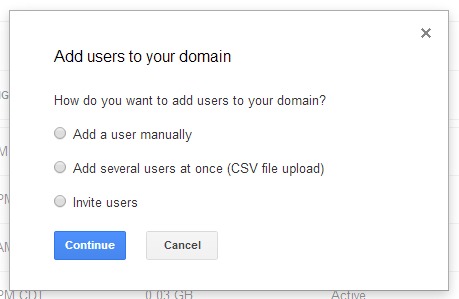
Click the Add User button in the User Apps Control Panel,
You’re presented with the Create a New User Dialog. Select Add a user Manually and click continue.
Enter the User’s First and last name and choose their primary email address. After you’ve created the user you can add email aliases when editing a user.
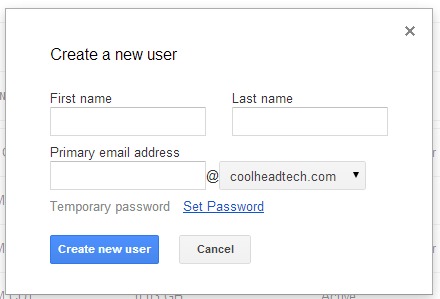
If you have multiple domains in Google Apps you’ll be presented with a list of available domain names. Google Apps will default to the primary domain.
The default for a new password in Google Apps is to have the system create a temporary password and require a change on first login. You can select Set Password to set your own for the user. It’s important for your organization to always have a strong password policy.
Click Create New User to activate the new Google Apps account.
2. Add Several Users at Once (CSV Upload)
If you have several users to add or even modify in Google Apps you can upload a CSV (comma separated values ) file with the basic user information necessary to create a new user.

Required Row 1 Values: Email Address, First Name, Last Name & Password
COOL TIP: You can use the CSV upload in the Google Apps Control Panel to change several accounts at once by choosing to update names and passwords.
After you’ve chosen your options and selected your completed CSV file, click continue and you’ll be presented with a confirmation of the accounts to review. Once you click Upload and continue the new accounts will be processed for creation by Google Apps and you’ll receive an email confirmation upon completion.
3. Invite Users
A final option for adding users is to simply invite them to create their own accounts in your Google Apps domain
When you invite users they can choose their own:
-
First & Last Name
-
Username
-
Password
Choose the Invite users option and click continue. You’ll be presented with an option to add several email addresses for invitations. After reviewing the names and email preview click Send Invitation. The user account will be created when the recipient accepts your invitation and enters the appropriate information.
.jpg?width=818&name=appsadmins-svg-rules-1%20(2).jpg)


